If you have ever looked at a crocheted blanket and thought, “I could never do that,” this guide is for you. Learning how to crochet for beginners comes down to a handful of small, repeatable motions: making a slip knot, chaining, and working one basic stitch over and over until your hands remember it. Everything else in crochet, from granny squares to amigurumi, builds on those same skills.
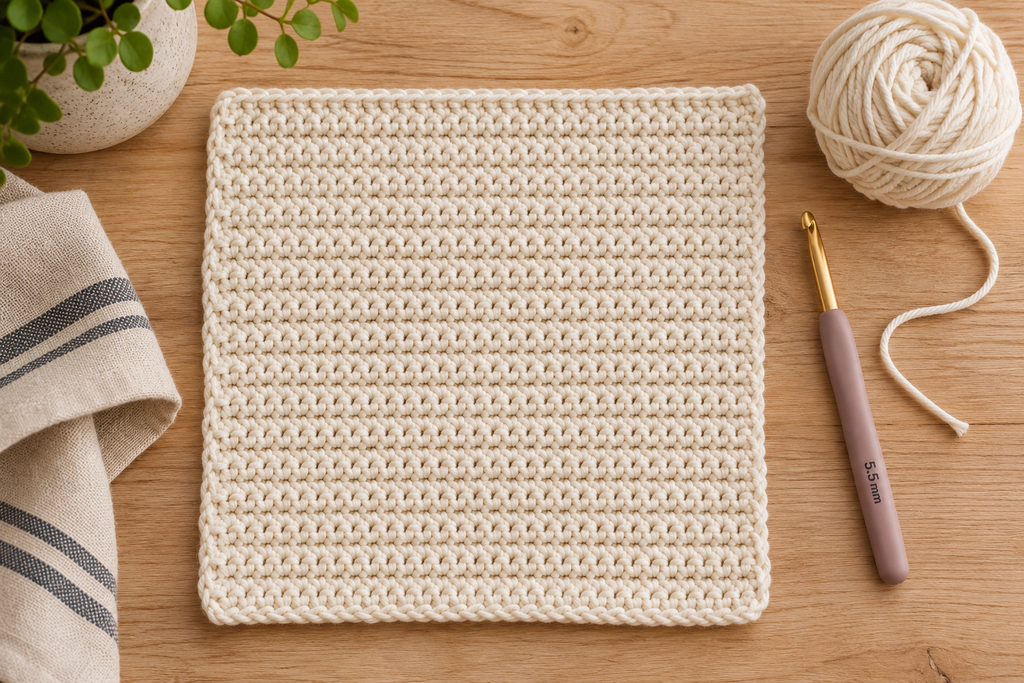
In this step-by-step guide, you will learn how to hold your hook and yarn, how to make a foundation chain, how to work the single crochet stitch, and how to turn your work at the end of each row. Then you will put it all together with a simple practice project: a single crochet square you can use as a dishcloth, a coaster set starter, or just a confidence-building swatch.
All instructions use US crochet terms. If you have been watching UK tutorials, note that a US single crochet is called a “double crochet” in UK terms. We explain this in more detail in the abbreviations section.
Table of Contents
About This Crochet Project
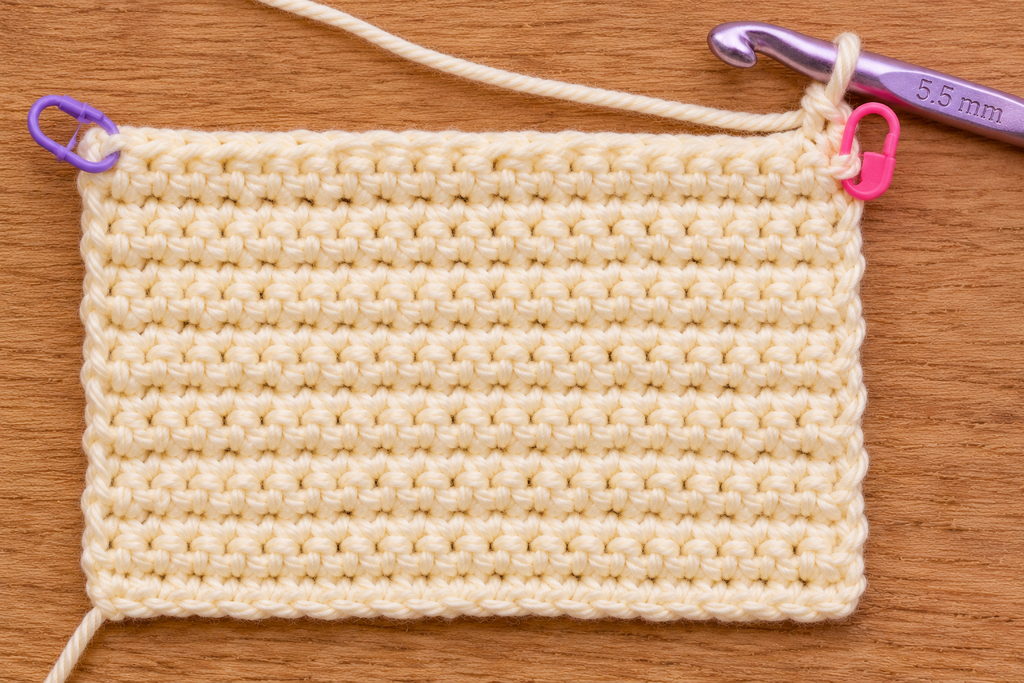
The practice project is a flat square worked back and forth in rows of single crochet (sc). It is intentionally simple: there are no increases, no decreases, no color changes and no special stitches. Every row has the same number of stitches, which makes it easy to check your work as you go.
Why a square? Because it teaches the three things beginners struggle with most:
- Keeping a consistent stitch count. If your edges start to slant or wave, you will know you have gained or lost a stitch.
- Turning correctly. You will practice the turning chain at the end of every row.
- Even tension. Roughly thirty rows of the same stitch is the fastest way to find a comfortable rhythm.
When you finish, you will have a usable, washable square in cotton yarn and the skills to move on to your first scarf or blanket.
Skill Level
Easy Beginner. No prior crochet experience needed. You only need to learn the slip knot, chain (ch), single crochet (sc), and how to fasten off.
Materials and Supplies
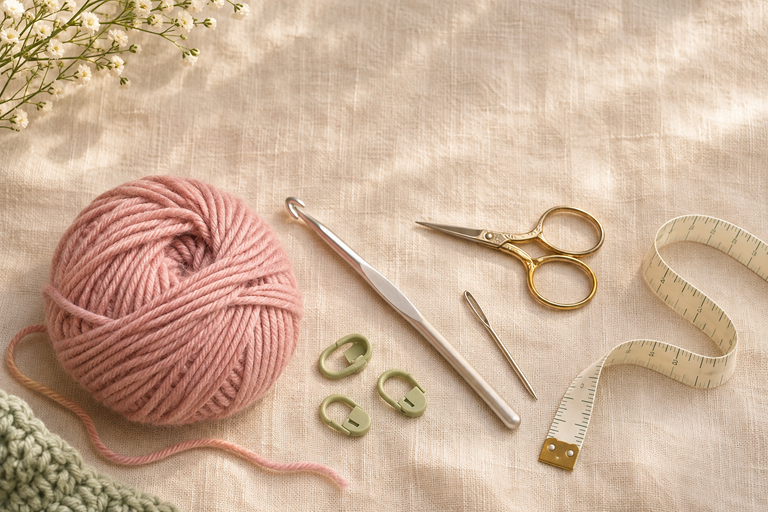
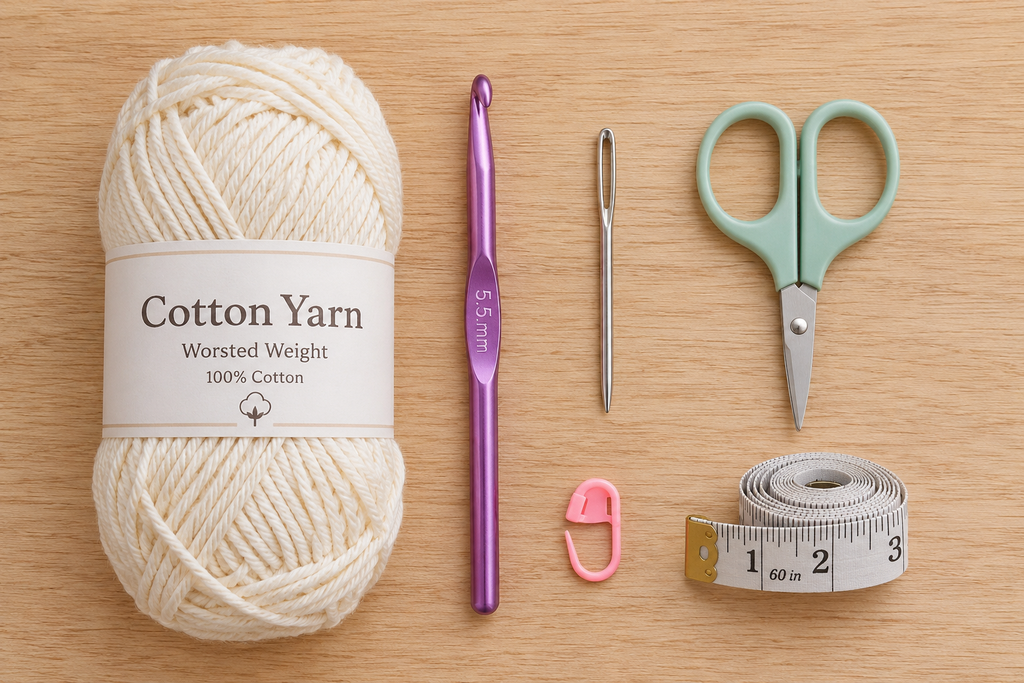
- Worsted weight (#4 Medium) 100% cotton yarn, 1 skein in a light, solid color (estimate: one standard skein of about 120 yards / 2.5 oz is expected to be enough; yarn usage must be confirmed with a sample)
- US I-9 (5.5 mm) crochet hook
- Yarn needle (tapestry needle) with a large eye, for weaving in ends
- Scissors
- 1 locking stitch marker (optional but very helpful)
- Measuring tape or ruler
Recommended Yarn Weight
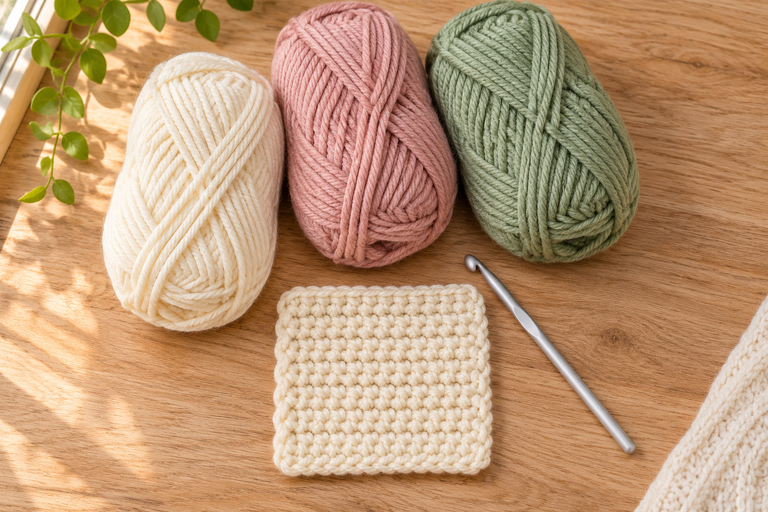
Use a worsted weight (#4 Medium) yarn. For a first project, choose:
- A light, solid color such as cream, light gray, pale yellow or sky blue. Dark and variegated yarns hide your stitches, which makes counting much harder.
- A smooth yarn that does not split easily. Cotton is a great choice because the stitches stay clearly defined and the finished square works as a dishcloth.
- Avoid fuzzy, eyelash, chenille or very loosely twisted yarns until you are comfortable reading your stitches.
Acrylic worsted yarn also works well for practice. It is a little stretchier than cotton, so your finished size may differ slightly.
Crochet Hook Size
This pattern is written for a US I-9 (5.5 mm) hook, which falls within the Craft Yarn Council’s commonly recommended range for #4 Medium yarn (about 5.5–6.5 mm, I-9 to K-10½). Always check your yarn label too, because most labels list a suggested hook size.
Beginners often crochet tightly. If inserting your hook into the stitches feels like a struggle, go up one hook size (US J-10 / 6 mm). If your fabric looks loose and holey, go down one size (US H-8 / 5 mm).
Gauge and Finished Size (Provisional)
Provisional gauge (to be confirmed by sample): approximately 13 sc and 14 rows = 4 inches (10 cm) in single crochet with a US I-9 (5.5 mm) hook.
Provisional finished size: approximately 8 × 8 inches (20 × 20 cm).
How this estimate was calculated: the square is 25 stitches wide. At 13 sc per 4 inches, 25 stitches ≈ 7.7 inches. Worsted yarns commonly fall between 11 and 14 sc per 4 inches, so your square could realistically be anywhere from about 7 to 9 inches wide.
Good news for beginners: gauge is not critical for this project. A square that comes out a little smaller or larger is still a perfectly usable dishcloth or practice piece. You will make it square by measuring, not by counting a fixed number of rows.
How to check your gauge (optional)
- Ch 16. Work rows of sc as described in the pattern (15 sc per row) for about 16 rows.
- Lay the swatch flat without stretching it.
- Count how many stitches fit across 4 inches in the middle of the swatch.
- If you have more stitches than the gauge, your tension is tight: try a larger hook. If you have fewer, your tension is loose: try a smaller hook.
US Crochet Abbreviations
| Abbreviation | Meaning (US terms) | UK equivalent |
|---|---|---|
| ch | chain | chain |
| sc | single crochet | double crochet (dc) |
| st(s) | stitch(es) | stitch(es) |
| sl st | slip stitch | slip stitch |
| yo | yarn over | yarn over hook (yoh) |
| rep | repeat | repeat |
| ( ) | stitch count at the end of a row | — |
Important: In US terms, “single crochet” is the shortest basic stitch. UK patterns call this same stitch “double crochet.” This pattern uses US terms only.
Special Stitches and Notes: Crochet Basics Step by Step
Before starting the pattern, practice each of these techniques a few times with your yarn and hook.
1. How to hold the hook
Hold the hook in your dominant hand. The two most common grips are:
- Pencil grip: hold the hook like a pencil, between your thumb and index finger, resting on your middle finger.
- Knife grip: hold the hook from above, like a dinner knife, with the handle under your palm.
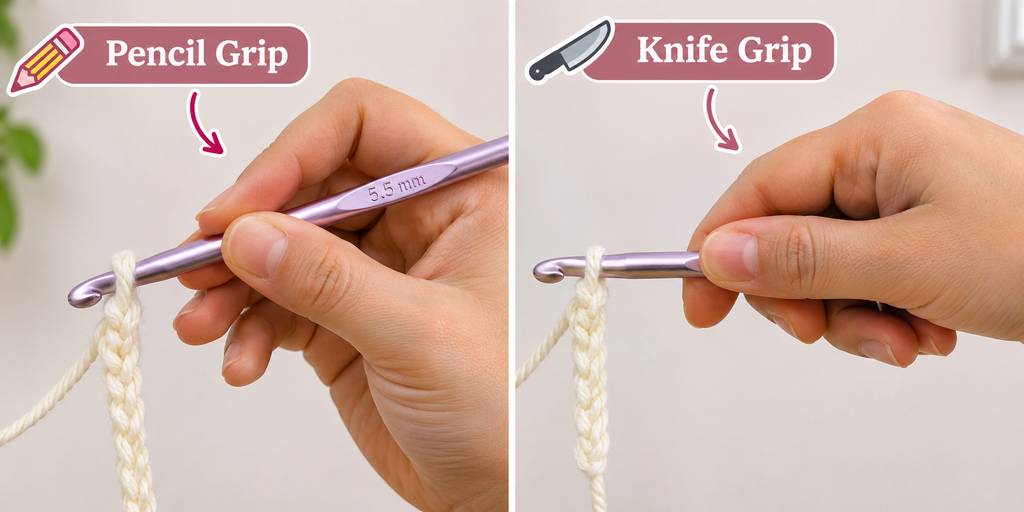
Neither is “correct.” Choose the one that feels most relaxed. Keep the hook’s throat (the groove) facing toward you or slightly down.
2. How to hold the yarn
The yarn goes in your other hand. A common method: drape the working yarn (the yarn coming from the ball) over your index finger, and hold it lightly against your palm with your pinky or ring finger. Your index finger controls tension; your thumb and middle finger pinch the work just below the hook.
Tension should feel firm but not tight, so the yarn slides smoothly through your fingers.
3. Slip knot
- Leaving a 6-inch tail, make a loop with the yarn so the working yarn crosses over the tail.
- Reach through the loop and pull up a second loop of working yarn.
- Place this new loop on your hook and gently pull both ends to snug it around the hook.
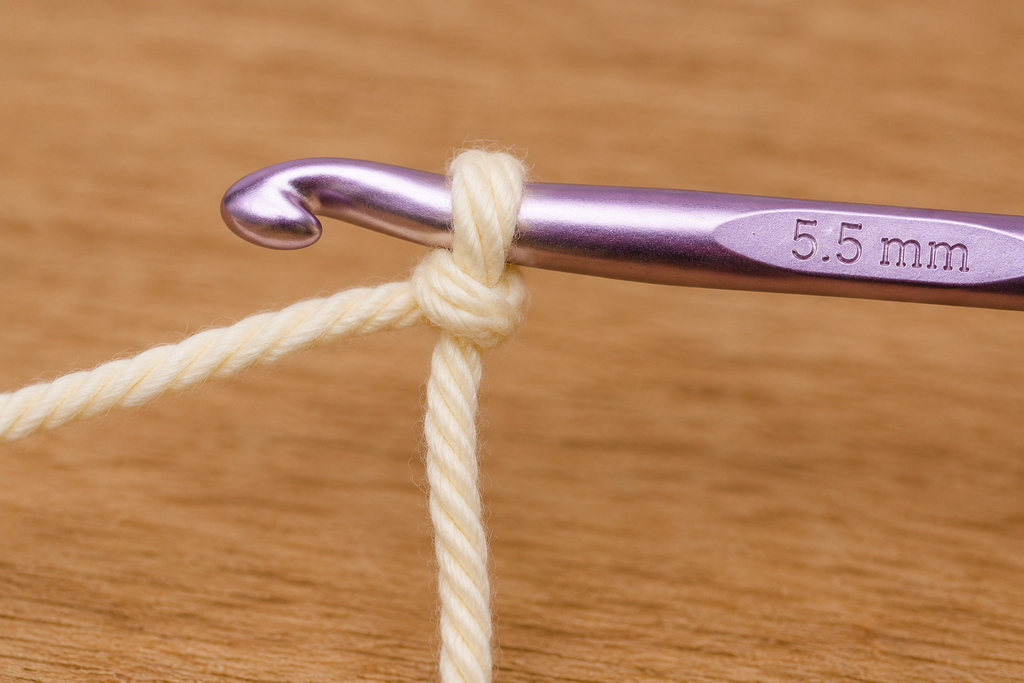
The slip knot sits on the hook and does not count as a stitch or a chain.
4. Chain (ch)
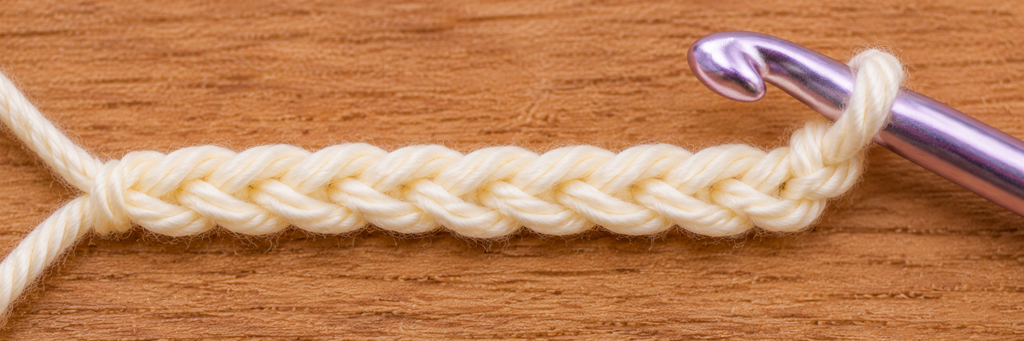
- With the slip knot on your hook, yarn over (yo): wrap the working yarn over the hook from back to front.
- Catch the yarn with the hook and pull it through the loop on your hook. One chain made.
- Repeat for the number of chains needed.
How to count chains: each “V” shape is one chain. Do not count the slip knot or the loop currently on your hook.
5. Single crochet (sc)
- Insert your hook into the indicated stitch or chain.
- Yo and pull up a loop. You now have 2 loops on the hook.
- Yo and pull through both loops. One sc made, with 1 loop left on the hook.
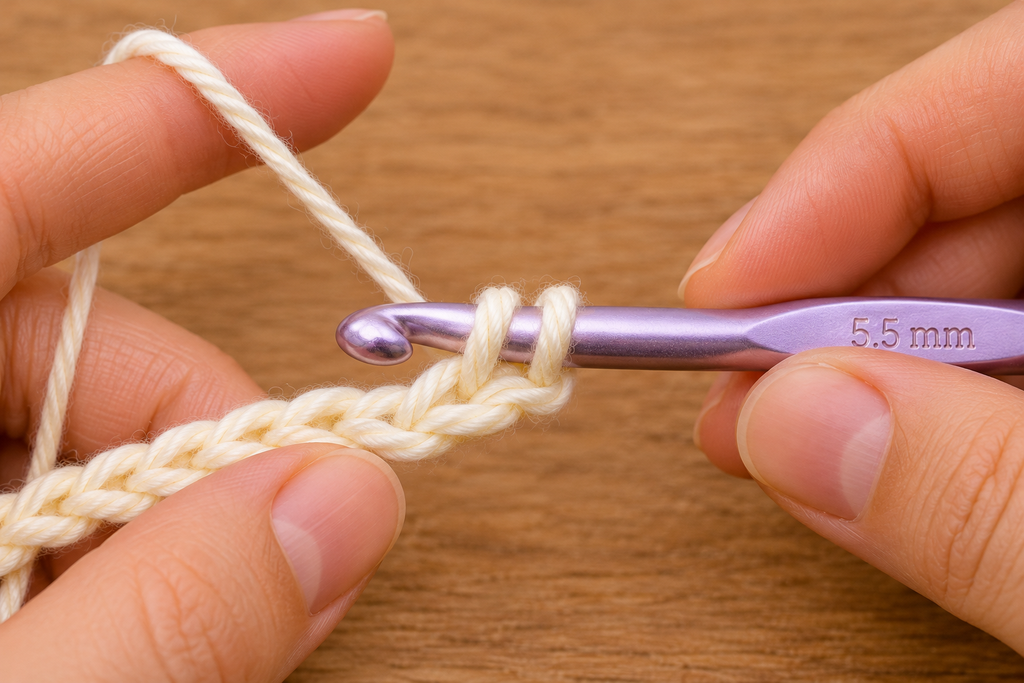
When working into stitches (not chains), insert the hook under both top loops of the stitch, the “V” that sits on top, unless a pattern says otherwise.
6. Turning chain
At the end of each row, you ch 1 and turn the work so you can crochet back across. In this pattern, the ch-1 turning chain does NOT count as a stitch. Always work your first sc into the very first stitch of the row, right at the base of the ch 1.
7. Fasten off
Cut the yarn, leaving a 6-inch tail. Yo and pull the tail all the way through the loop on your hook. Pull snug to lock it.
Step-by-Step Crochet Pattern: Beginner Single Crochet Square
Pattern notes
- Worked flat in rows, back and forth. You turn the work at the end of every row.
- The ch 1 at the beginning of each row is a turning chain and does not count as a stitch.
- Every row has 25 sc. There are no increases or decreases.
- Tip: place a stitch marker in the first sc and the last sc of Row 2. Move them up as you go. This helps you find the edge stitches, which are the ones beginners most often miss.
Row-by-Row Instructions
Foundation: Make a slip knot and place it on your hook. Ch 26.
(The 26th chain is the extra chain that gets skipped in Row 1. It is not a turning chain that counts as a stitch.)
Row 1: Sc in 2nd ch from hook and in each ch across. Ch 1, turn. (25 sc)
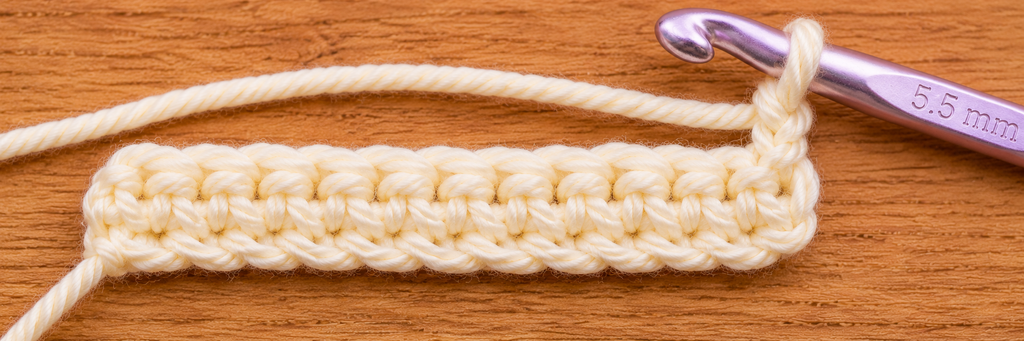
How to find the 2nd ch from the hook: do not count the loop on your hook. The first V next to it is the 1st ch; skip it and insert your hook into the next one.
Row 2: Sc in first st and in each st across. Ch 1, turn. (25 sc)
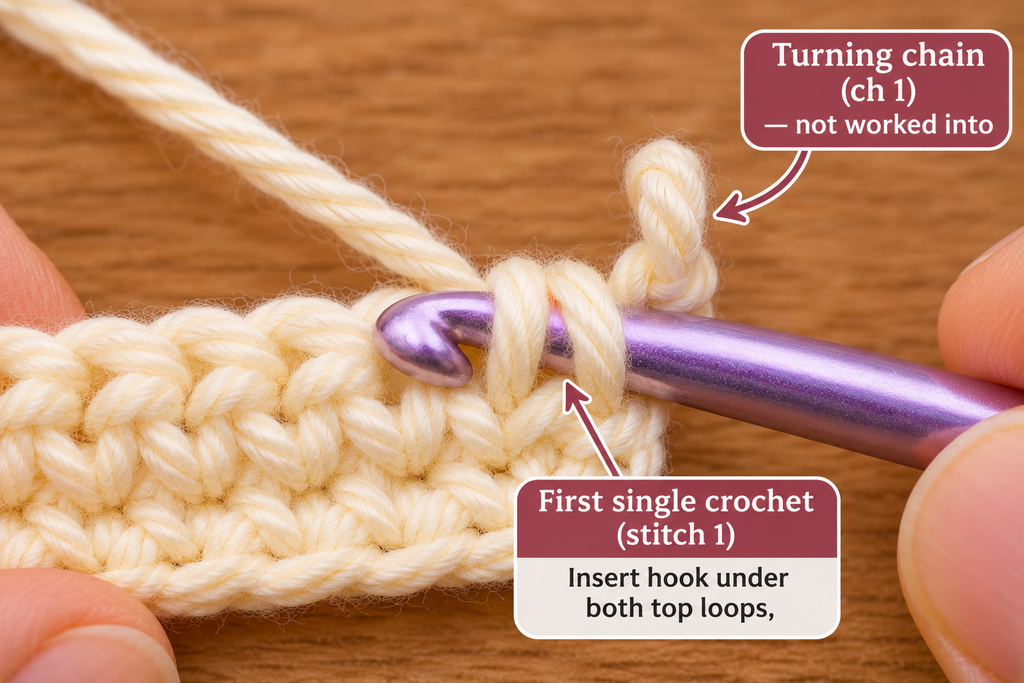
The first st is the one directly at the base of your ch 1. The last st is the final sc of the previous row; it can hide at the very edge, so look for it.
Rows 3 to approximately 28: Rep Row 2. (25 sc in every row)
Stop when the piece measures the same height as its width. To check, fold one bottom corner up diagonally to the opposite side edge; if it forms a neat triangle, your square is square. Your row count may be a few rows more or less than 28 depending on your tension. (Row count is provisional and must be confirmed with a sample.)
On the final row, do not ch 1. Fasten off.
Stitch Counts
| Row | Instruction | Stitch count |
|---|---|---|
| Foundation | Ch 26 | 26 ch |
| Row 1 | Sc in 2nd ch from hook and each ch across | 25 sc |
| Row 2 | Ch 1 (does not count), sc in each st across | 25 sc |
| Rows 3–27 (approx.) | Rep Row 2 | 25 sc each row |
| Final row | Rep Row 2, omit ch 1, fasten off | 25 sc |
Want a different size? Chain any number you like, plus 1. For example, ch 21 gives 20 sc per row for a smaller square (estimated 6 inches wide), and ch 31 gives 30 sc per row (estimated 9 inches wide). (Size estimates are provisional.)
Finishing and Assembly
There is no assembly for this project, just finishing:
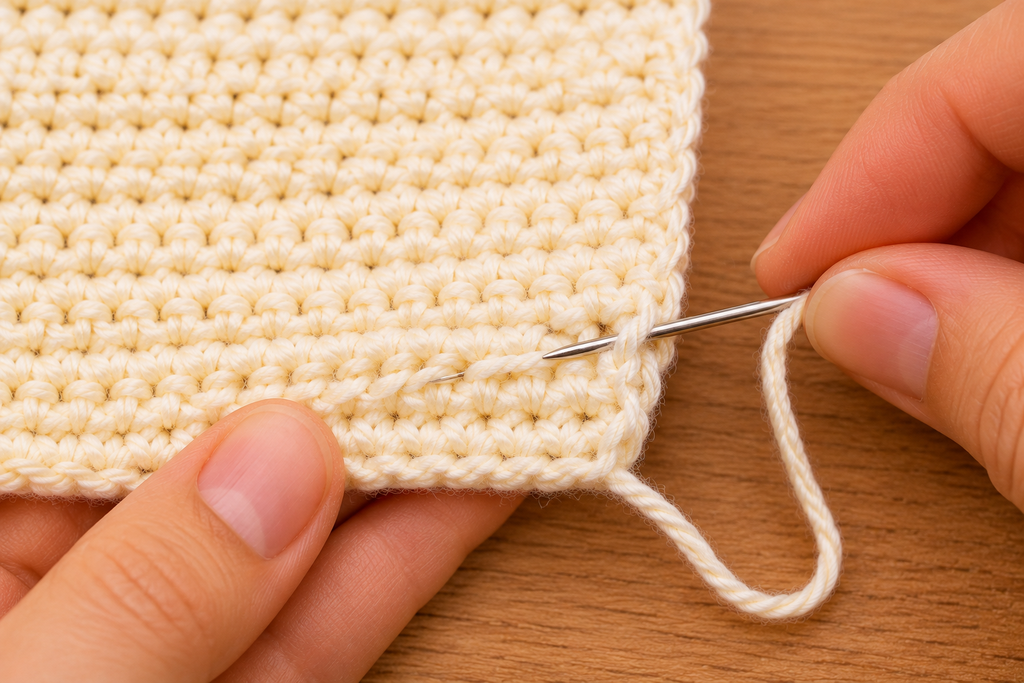
- Weave in the ends. Thread the beginning tail onto your yarn needle. Weave it through the stitches along the edge for about 2 inches, then turn and weave back about 1 inch in a different direction. This locks it in place. Trim close to the fabric without cutting your stitches. Repeat with the ending tail.
- Check the edges. Count the stitches in the final row (25 sc). If the sides are straight, you have kept your count.
- Optional blocking. If the square curls slightly, dampen it, pat it into a square shape on a towel, and let it dry flat. Cotton responds well to this.
Helpful Beginner Tips for Learning How to Crochet
- Count every row for the first ten rows. It takes 20 seconds and saves you from ripping out half your work later.
- Use stitch markers in the first and last stitch of each row. Edge stitches are the easiest to skip or add by accident.
- Relax your grip. Tight shoulders and a death grip on the yarn create tight stitches. Take breaks and shake out your hands.
- Work on the hook’s shaft, not its throat. Slide each new loop onto the thicker shaft of the hook so all your stitches come out the same size.
- It is okay to frog. “Frogging” means pulling out stitches (“rip it, rip it”). Every crocheter does it. Pull the hook out, gently tug the yarn back to the mistake, and reinsert your hook into the last good loop.
- Practice in short sessions. Twenty minutes a day builds muscle memory faster than one long weekend session.
Common Mistakes and Solutions
| Problem | Likely cause | Solution |
|---|---|---|
| Square gets narrower (edges slant inward) | Skipping the last stitch of the row, or skipping the first stitch | Mark the first and last stitch of each row; count to 25 at the end of each row |
| Square gets wider (edges flare outward) | Working into the turning chain as if it were a stitch, or working two sc into one stitch | Remember the ch 1 does not count; work the first sc at the base of the ch 1, not into it |
| Foundation chain is very tight and hard to work into | Tense chaining | Chain with a hook one size larger than the pattern hook, then switch back for Row 1 |
| Bottom edge is narrower than the rest of the square | The chain is tighter than the stitches | Use the larger-hook trick for the chain, or chain more loosely |
| Holes or gaps in the fabric | Loose tension or inserting hook into the wrong spot | Make sure you insert under both top loops of each stitch; try a smaller hook |
| Yarn keeps splitting | Pointy hook or loosely plied yarn | Try a hook with a rounder head, or a smoother, tighter-twisted yarn |
| Can’t tell which side you’re on | Both sides of sc look similar | That’s normal for sc. Keep your beginning tail at the bottom-left (right-handed) or bottom-right (left-handed) corner as a landmark |
Care Instructions
Follow the care instructions on your yarn label. Most 100% cotton worsted yarns can be machine washed and dried, which makes this square a practical dishcloth. Cotton may shrink slightly the first time it is washed in hot water and dried in a dryer, so wash and dry your square once before measuring it as a finished dishcloth. If you used acrylic yarn, avoid high dryer heat.
Frequently Asked Questions
What is the easiest stitch to learn first?
The chain comes first, because it forms your foundation. After that, single crochet (sc) is the easiest working stitch for beginners: it is short, sturdy and makes it easy to see where each stitch goes.
How long does it take to learn how to crochet for beginners?
Most people can make a chain and a few rows of single crochet in their first sitting. Getting comfortable with even tension usually takes a few practice projects. There is no deadline; the practice square is designed to be the place where that learning happens.
What size crochet hook should a beginner use?
A mid-size hook paired with worsted weight yarn is easiest to handle. This pattern uses a US I-9 (5.5 mm) hook. Very small hooks and thin yarns make stitches hard to see; very large hooks can feel awkward to control.
Does the turning chain count as a stitch?
It depends on the pattern and the stitch. For single crochet, the ch 1 turning chain usually does not count, and that is the case in this pattern. Taller stitches, such as double crochet, often use a ch 3 that does count. Always check the pattern notes.
Why is my crochet getting wider (or narrower)?
You are adding or losing stitches, almost always at the start or end of a row. See the Common Mistakes table above.
Is it better to learn with US or UK terms?
Use whichever matches the patterns you plan to follow. Most patterns from US designers, including everything on CrochetBloomly, use US terms. The key difference: US single crochet = UK double crochet.
Can left-handed people follow this guide?
Yes. Hold the hook in your left hand and the yarn in your right. You will work rows from left to right instead of right to left, but the stitches and counts are exactly the same
Conclusion
Learning how to crochet for beginners is really about learning a few motions well: a slip knot, a chain, a single crochet and a turn. Once those feel natural, you can follow most beginner patterns with confidence. Your practice square may not be perfect, and that’s fine. Wobbly edges and uneven stitches are part of how every crocheter learns.
Make your square, wash it, use it, and then make another one. You’ll be surprised how much neater the second one looks. When you’re ready, move on to a scarf or a simple blanket using the same single crochet rows you just mastered.