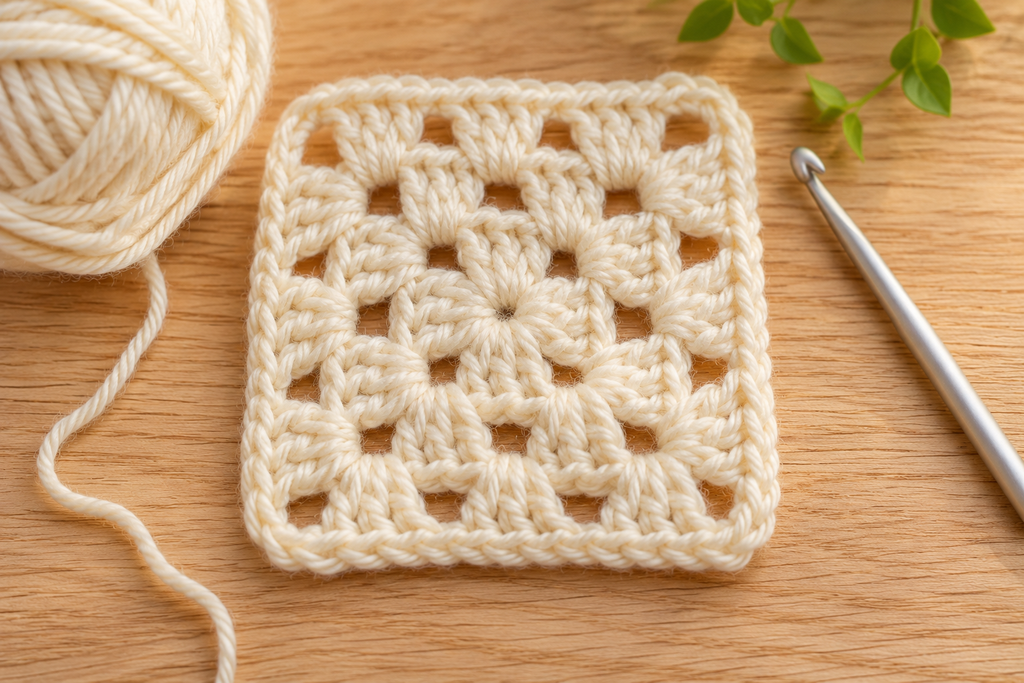
If you have ever admired a cozy patchwork blanket and wondered where to start, the answer is almost always the same: a granny square. This guide to the granny square for beginners walks you through one classic square, round by round, using only chains, slip stitches and double crochet.
Granny squares are small, portable and quick. You can finish one in a single sitting, and every square you make is practice for the next. Once you can make one, you can make coasters, pillow covers, tote bags and full-size blankets from the same basic motif.
This pattern uses US crochet terms throughout. Every round includes a stitch count so you can check your work as you go.
Table of Contents
About This Granny Square for Beginners
The classic granny square is built from groups of three double crochet stitches, called clusters. The clusters sit in the spaces between other clusters rather than in the tops of individual stitches. That makes the granny square forgiving: you work into large, easy-to-see gaps instead of hunting for small loops.
The square grows outward from a small center ring. Each corner gets two clusters separated by a chain-2 space, which is what turns the circle of stitches into a square. Along each side, single clusters are separated by chain-1 spaces.
This version is four rounds in a single color. It finishes as a small square (estimated, see Gauge and Finished Size) that works on its own as a coaster or can be joined with others into larger projects. Optional notes explain how to change colors and how to keep adding rounds.
Skill Level
Easy Beginner. You should know how to make a slip knot, chain (ch), slip stitch (sl st) and double crochet (dc). No other stitches are used. If double crochet is new to you, practice a few rows of it before starting the square.
Materials and Supplies
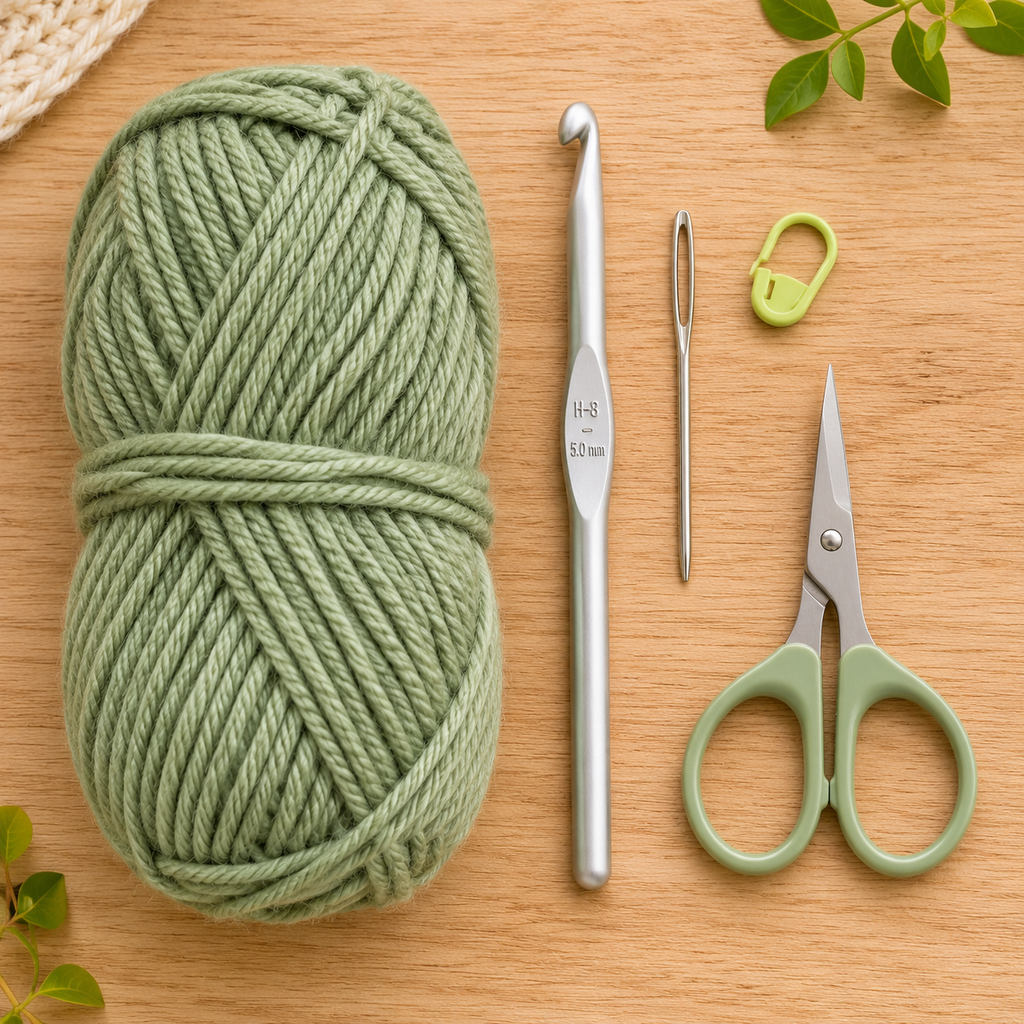
- Worsted weight (#4 Medium) yarn in one light, solid color (light colors make stitches easier to see)
- US size H-8 (5 mm) crochet hook
- Yarn needle (tapestry needle) with a large eye
- Scissors
- Optional: stitch marker, ruler or tape measure, blocking mat and pins
Yarn amount (estimate, not verified): one four-round square is expected to use a small amount of yarn, likely well under one ounce. The exact yardage must be measured on a test sample before publication.
Recommended Yarn Weight for a Beginner Granny Square
Use a smooth worsted weight (#4) yarn, such as 100% acrylic or a cotton blend. Smooth yarn shows each stitch clearly and is easy to undo if you make a mistake. Avoid fuzzy, dark, or highly textured yarns for your first square because they hide the stitches and spaces you need to see.
Acrylic is affordable and machine washable, which makes it a good practice yarn. Cotton is a good choice if you plan to use the square as a coaster.
Crochet Hook Size
A US H-8 (5 mm) hook is a common match for worsted weight yarn. Check the hook size printed on your yarn label and use that as your starting point. If your stitches feel very tight, try a US I-9 (5.5 mm) hook. If your square looks loose and holey, try a US G-6 (4 mm) hook.
Gauge and Finished Size (Provisional)
These figures are estimates and have not been confirmed with a physical sample.
| Measurement | Provisional value | Status |
|---|---|---|
| Gauge | Rounds 1–2 measure about 2.5 to 3 in across | Estimate, must be measured |
| Finished size, 4 rounds | About 4.5 to 5.5 in square, before blocking | Estimate, must be measured |
| Yarn used, 4 rounds | To be measured | Not yet known |
Gauge is not critical for a single square. It does matter if you are making many squares to join, because all squares need to be the same size. Make one square, measure it edge to edge across the middle, and use the same hook and yarn for every square in the project.
US Crochet Abbreviations
| Abbreviation | Meaning |
|---|---|
| ch | chain |
| ch-sp | chain space (the gap made by one or more chains) |
| ch-1 sp | chain-1 space (side space) |
| ch-2 sp | chain-2 space (corner space) |
| dc | double crochet (US). This is the same stitch UK patterns call a treble (tr). |
| sl st | slip stitch |
| sp | space |
| st(s) | stitch(es) |
| beg | beginning |
| rep | repeat |
| * | repeat the instructions after the asterisk as directed |
| ( ) | work everything inside the parentheses into the same space |
| [ ] | work the bracketed instructions the number of times stated |
Special Stitches and Notes
Cluster: a group of 3 dc worked into the same space. Clusters are the building blocks of the granny square.
Corner: (3 dc, ch 2, 3 dc) worked into the same ch-2 space. Each corner contains 2 clusters.
Beginning chain-3: at the start of every round, ch 3. The ch-3 counts as the first dc of the round and is included in all stitch counts.
Joining a round: at the end of every round, sl st into the top (3rd chain) of the beginning ch-3. The joining sl st does not count as a stitch.
Chain spaces are not stitches. The ch-1 and ch-2 spaces are counted separately from the dc in every stitch count.
No turning. This square is worked in the round with the right side facing you the whole time. You do not turn your work between rounds.
Working into spaces: in Rounds 2 to 4, insert your hook into the gap under the chains, not into the chains themselves.
Step-by-Step Granny Square Crochet Pattern
Read each round all the way through before you start it. Leave a 6 in tail at the start so you can weave it in later.
Make the Center Ring
Make a slip knot and place it on your hook. Ch 4. Sl st into the first ch you made (the one farthest from your hook) to form a small ring.
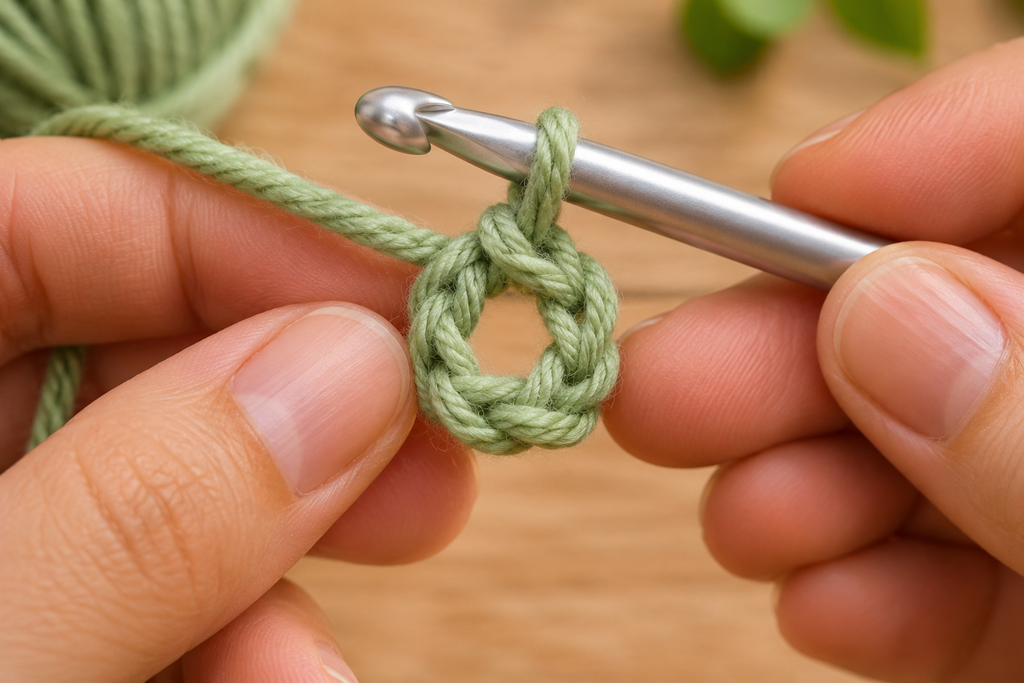
Magic ring option: if you already know the magic ring (also called the magic circle), you may use it instead of the ch-4 ring. Work Round 1 into the magic ring, then pull the tail to close the center before joining.
Round-by-Round Instructions
Round 1: Ch 3 (counts as first dc), 2 dc in ring, ch 2, [3 dc in ring, ch 2] 3 times. Join with sl st to top of beg ch-3.
Stitch count: 12 dc (4 clusters) and 4 ch-2 corner spaces.
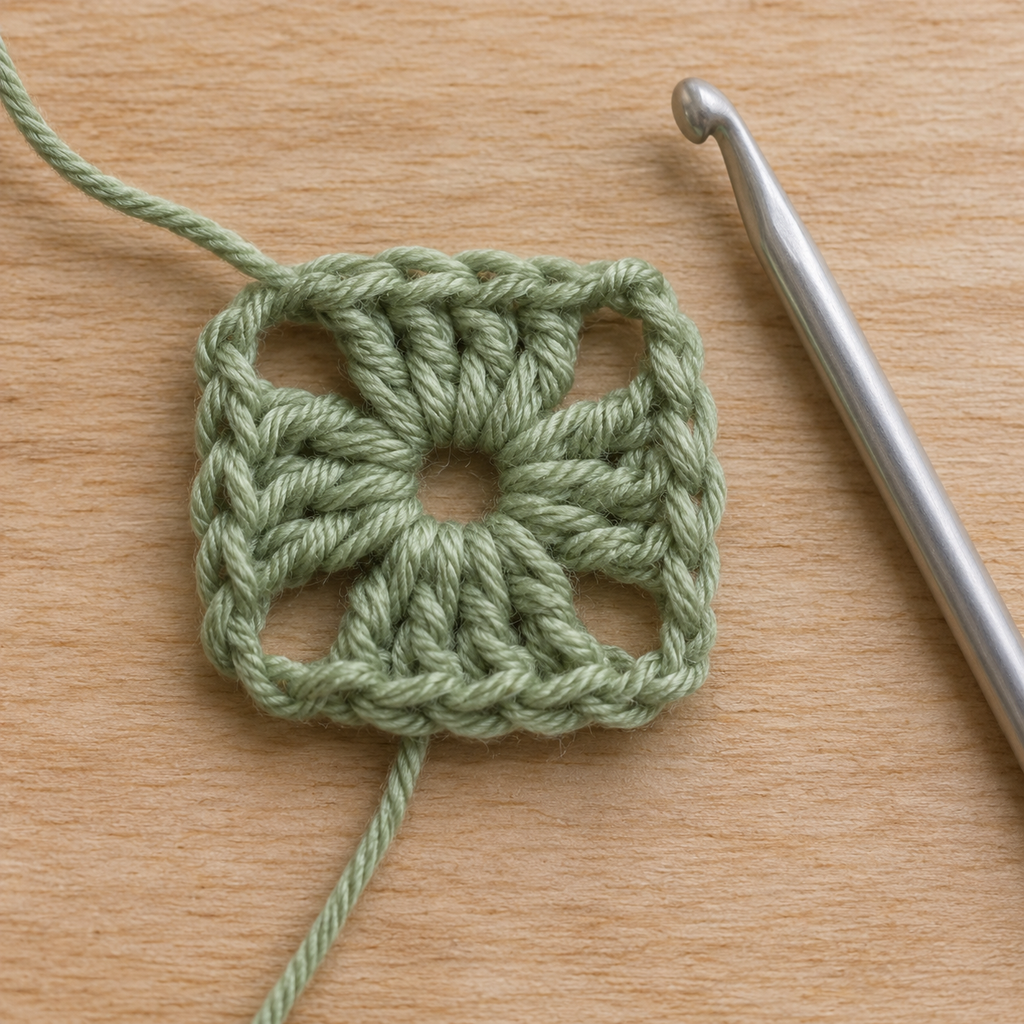
Round 2: Sl st in each of the next 2 dc, then sl st into the next ch-2 sp. This moves your hook to the first corner without adding stitches. Ch 3 (counts as dc), (2 dc, ch 2, 3 dc) in same ch-2 sp. This is your first corner. Ch 1. *(3 dc, ch 2, 3 dc) in next ch-2 sp, ch 1; rep from * 2 more times. Join with sl st to top of beg ch-3.
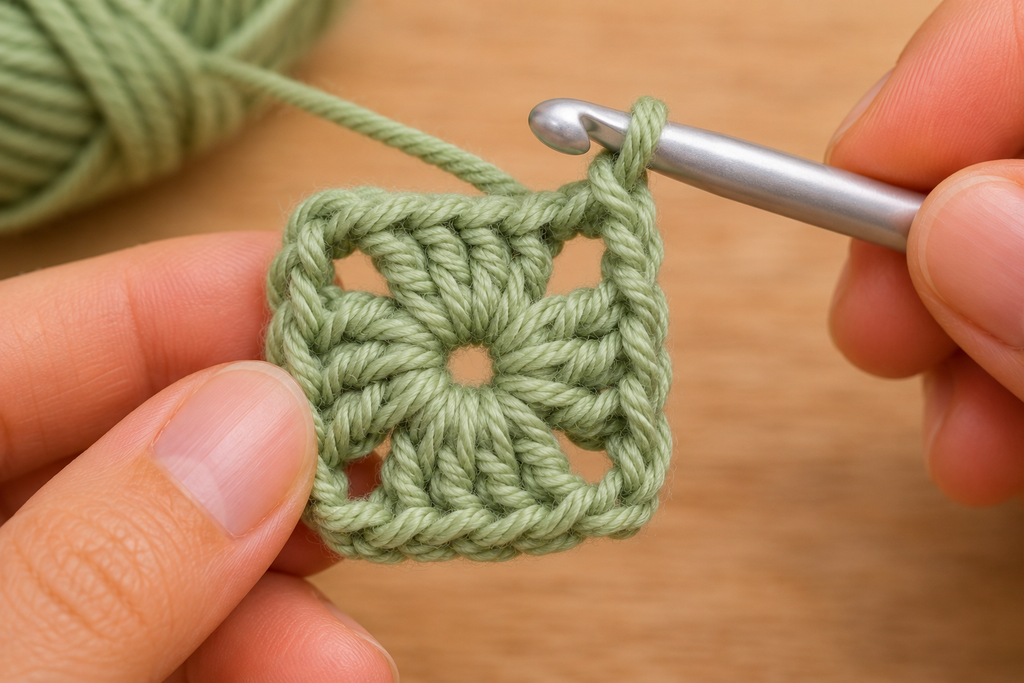
Stitch count: 24 dc (8 clusters), 4 ch-2 corner spaces and 4 ch-1 side spaces.
Round 3: Sl st in each of the next 2 dc, then sl st into the next ch-2 sp. Ch 3 (counts as dc), (2 dc, ch 2, 3 dc) in same ch-2 sp, ch 1, 3 dc in next ch-1 sp, ch 1. *(3 dc, ch 2, 3 dc) in next ch-2 sp, ch 1, 3 dc in next ch-1 sp, ch 1; rep from * 2 more times. Join with sl st to top of beg ch-3.
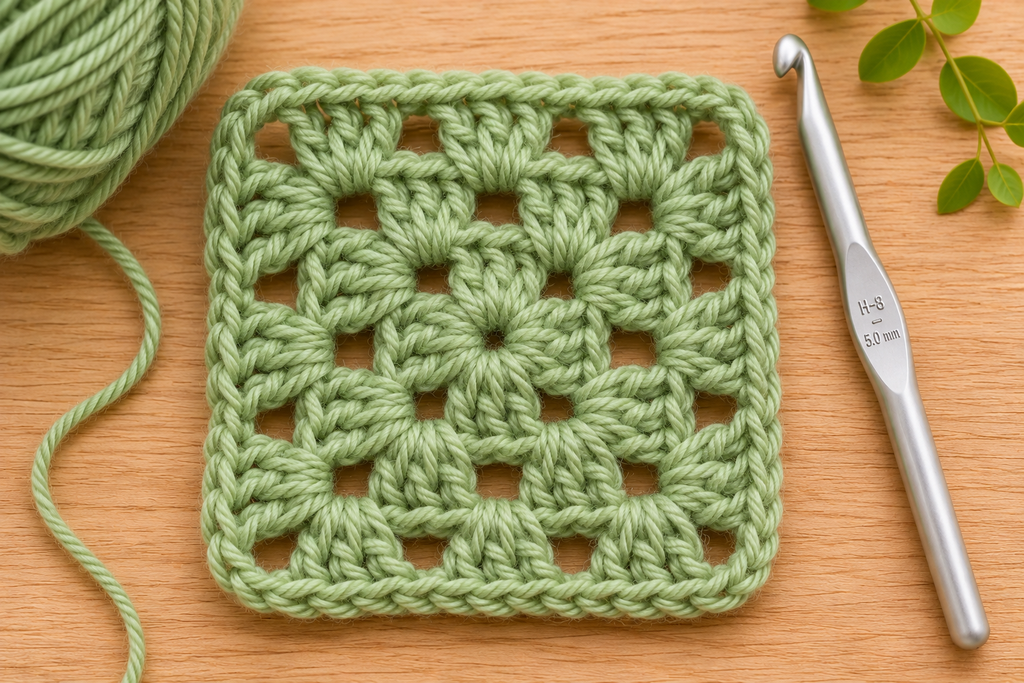
Stitch count: 36 dc (12 clusters), 4 ch-2 corner spaces and 8 ch-1 side spaces.
Round 4: Sl st in each of the next 2 dc, then sl st into the next ch-2 sp. Ch 3 (counts as dc), (2 dc, ch 2, 3 dc) in same ch-2 sp, ch 1, [3 dc in next ch-1 sp, ch 1] 2 times. *(3 dc, ch 2, 3 dc) in next ch-2 sp, ch 1, [3 dc in next ch-1 sp, ch 1] 2 times; rep from * 2 more times. Join with sl st to top of beg ch-3.
Stitch count: 48 dc (16 clusters), 4 ch-2 corner spaces and 12 ch-1 side spaces.
Fasten off: cut the yarn, leaving a 6 in tail, and pull the tail through the loop on your hook.
Stitch Counts at a Glance
| Round | dc (incl. beg ch-3) | Clusters | Ch-2 corner sps | Ch-1 side sps | Clusters per side, between corners |
|---|---|---|---|---|---|
| 1 | 12 | 4 | 4 | 0 | 0 |
| 2 | 24 | 8 | 4 | 4 | 0 |
| 3 | 36 | 12 | 4 | 8 | 1 |
| 4 | 48 | 16 | 4 | 12 | 2 |
Each round adds 4 clusters (12 dc) and 4 ch-1 spaces. The number of corner spaces never changes.
Optional: Keep Going for a Bigger Square
To add Round 5 and beyond, work exactly like Round 4, but work one more [3 dc in next ch-1 sp, ch 1] repeat along each side than you did in the round before. Round 5 has 3 side clusters per side, 60 dc (20 clusters) and 16 ch-1 spaces. Each new round adds 12 dc. Larger sizes have not been measured.
Optional: Changing Colors
To give each round a new color, finish the round with the joining sl st and fasten off. Join the new color with a sl st in any ch-2 corner space. Ch 3 and continue the next round from “(2 dc, ch 2, 3 dc) in same ch-2 sp.” Skip the sl sts across the first cluster, because you are already in the corner. Weave in both tails as you go or at the end.
Finishing and Assembly
- Weave in the ends. Thread one tail onto your yarn needle. Run it under the backs of several stitches in one direction, then turn and go back the other way through different stitches. Trim close to the work. Repeat with the other tail.
- Block the square (optional but helpful). Lightly spray the square with water, pat it flat into a square shape on a blocking mat or towel, and pin the four corners. Let it dry completely. Blocking straightens the edges and makes squares easier to join. Use the method on your yarn label; acrylic should not be steam-blocked with a hot iron.
- Join squares (for larger projects). Place two squares right sides together with edges lined up. Using a yarn needle and matching yarn, whipstitch through the back loops of each pair of matching stitches, corner to corner. Join squares into rows, then join the rows.
Helpful Beginner Tips
- Count your clusters, not just your stitches. A quick check is 4 clusters in Round 1, then 4 more in every round after.
- Look for the corners. Every round has exactly 4 ch-2 corner spaces. If you find 3 or 5, stop and look back.
- Keep your tension relaxed. Tight chains make the spaces hard to find. If you struggle to fit 3 dc into a space, loosen up or try a larger hook.
- Use a stitch marker. Place it in the top of the beginning ch-3 so you can find the join at the end of the round.
- Pull up the first loop. After the ch-3, make sure your first dc sits snug next to it so there is no gap.
- Practice the first square in one color. Color changes add extra ends and steps. Try them on your second square.
Common Mistakes and Solutions
| Problem | Likely cause | Solution |
|---|---|---|
| Square curls into a cup | Tension too tight, or too few chains between clusters | Check that you made ch 2 at corners and ch 1 on sides; try a larger hook |
| Square ruffles or waves | Extra clusters or extra chains | Count clusters per round against the stitch count table |
| Corners look rounded | Ch 1 used at a corner instead of ch 2 | Every corner needs (3 dc, ch 2, 3 dc) in one space |
| Square twists or slants | Working into stitch tops instead of spaces, or turning the work | Keep the right side facing you and insert the hook under the chains |
| A gap appears at the join | Beginning ch-3 is loose, or the sl sts to the corner were skipped | Tighten the ch-3 slightly; always sl st across 2 dc and into the corner before the ch-3 |
| Center hole is large | Chain-4 ring is loose | Use the magic ring option and pull the tail tight |
| Sides have unequal cluster counts | A repeat was missed or doubled | Count side clusters between each pair of corners; each side should match |
Care Instructions
Follow the care directions on your yarn label. For most acrylic yarns, machine wash cool on a gentle cycle and lay flat to dry or tumble dry low. For cotton, wash cool and lay flat to dry to help the square keep its shape. Reshape the square while damp.
Frequently Asked Questions
Is a granny square good for beginners?
Yes. It uses only chains, slip stitches and double crochet, and you work into large spaces instead of individual stitches. It is one of the most common first projects for new crocheters.
Does the ch-3 count as a stitch?
Yes. In this pattern the beginning ch-3 always counts as the first dc of the round and is included in every stitch count.
Why do I slip stitch at the start of Rounds 2 to 4?
The slip stitches move your hook from the join to the next corner space without adding height or stitches. That way each round starts in a corner.
What is the difference between US and UK granny square patterns?
The stitch is the same; the name changes. US double crochet (dc) is called treble crochet (tr) in UK patterns. This pattern uses US terms only.
How many granny squares do I need for a blanket?
That depends on the finished size of your square and the size of the blanket. Make and measure one square first, then divide the blanket width and length by the square size to find the number of squares per row and the number of rows.
Can I use a different yarn weight?
Yes. The pattern works with any yarn weight. Use the hook size recommended on the yarn label. The finished size will change.
My square is not flat. What should I check first?
Count the clusters and spaces in each round against the stitch count table, then check that every corner has ch 2.
Related Crochet Projects
- How to make a magic ring (beginner tutorial)
- How to double crochet for beginners
- How to weave in crochet ends
- How to block crochet projects
- How to join granny squares (whipstitch and slip stitch methods)
- Granny square coaster set
- Granny square tote bag
- Beginner granny square blanket
Conclusion
The classic granny square is the perfect small project for learning to crochet in the round. With just three stitches and a clear stitch count for each round, you can check your progress and fix mistakes early.
Start with one square in a light, solid color. Once you are comfortable, try changing colors, adding more rounds, or joining several squares into a coaster set or blank. Every granny square for beginners you make builds the skills you will use in larger projects.