Almost every crochet project starts in the same place: a slip knot on your hook. If you are learning how to make a slip knot for crochet, you are learning the very first move of the craft. The knot anchors your yarn to the hook and becomes the starting loop for your foundation chain.
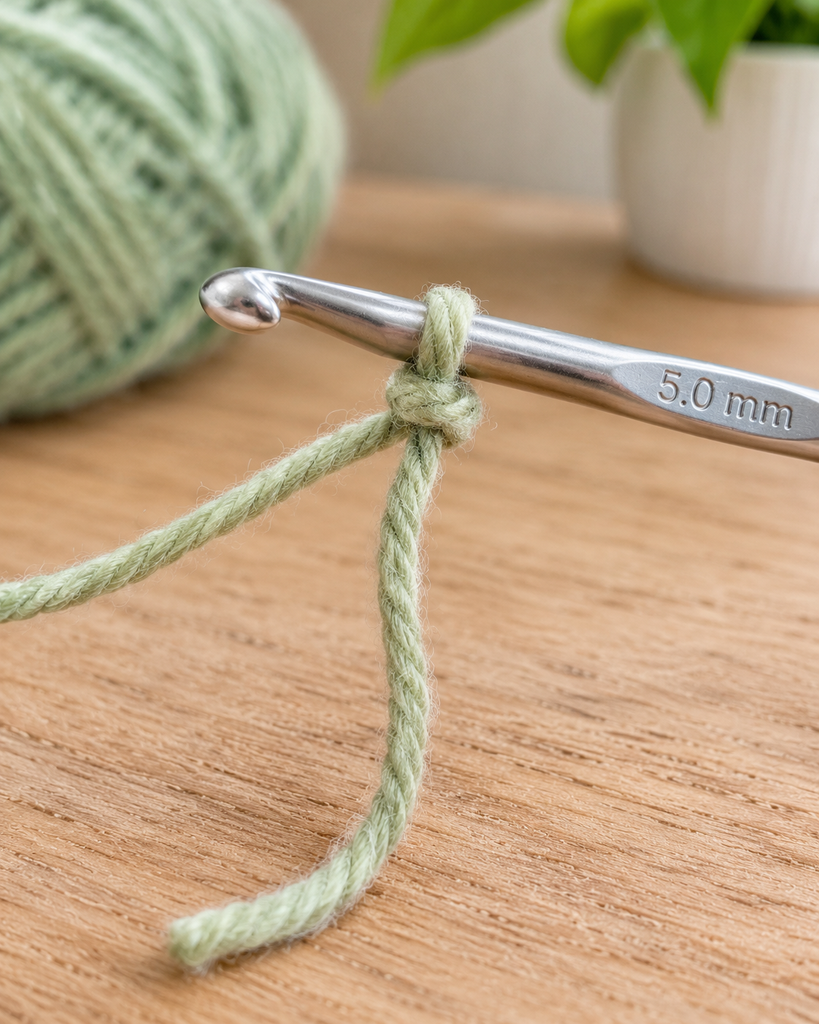
The slip knot is small, but it can be frustrating at first. Your fingers are doing something new, the yarn may twist, and the loop never seems to be the right size. This guide breaks the knot into small, clear steps. It explains which end of the yarn does what and shows you how to fix the most common problems.
When your knot is on the hook, an optional practice swatch lets you use it straight away. You will chain, work single crochet, and see how the slip knot fits into a real piece of fabric.
Table of Contents
About this crochet technique
A slip knot is an adjustable loop. Pull one end of the yarn and the loop gets smaller or larger. Pull the other end and the knot itself tightens. Because the loop slides, you can fit it snugly around any hook size.
In crochet, the slip knot:
- holds the yarn on the hook so you can start chaining
- becomes the loop on your hook for the first chain
- usually does not count as a stitch or a chain in US patterns (always check the designer’s notes)
- is hidden at the corner of the finished piece and is often woven in with the starting tail
It is not the same as a slip stitch (sl st). A slip stitch is worked into existing stitches. A slip knot is only the starting loop. The names are similar, so beginners often mix them up.
Skill level
Easy Beginner. You need no crochet experience. This is the first skill most teachers cover, before the chain stitch.
Materials and supplies for a crochet slip knot
- Smooth, light-colored worsted weight yarn (a small amount; see the note below)
- Crochet hook in the size the yarn label recommends (see the hook section)
- Scissors
- Yarn needle (tapestry needle), only if you make and finish the practice swatch
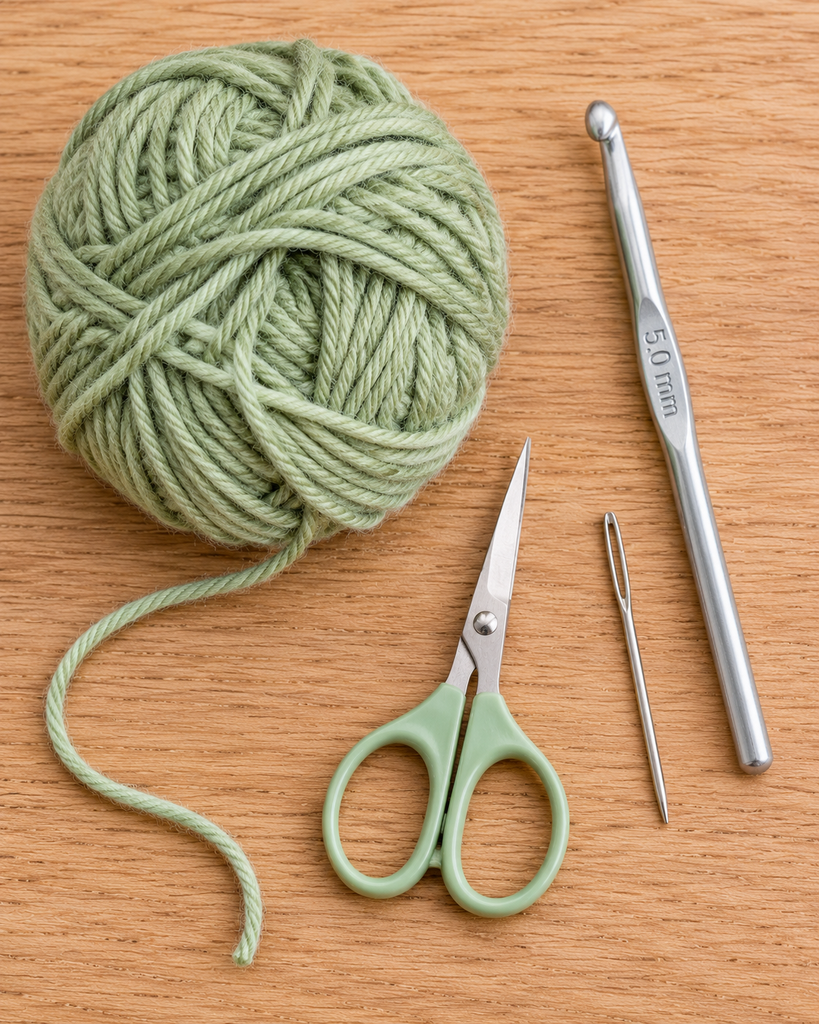
Yarn amount (estimate, not measured): A slip knot uses only a few inches of yarn. The optional 10-stitch × 6-row practice swatch should need well under one small skein. Measure the exact yardage when the sample is made.
Recommended yarn weight
Worsted weight (CYC Medium #4) in a smooth, light-colored acrylic or cotton is the usual choice for learning. A light color makes the loops easy to see. A smooth yarn lets the knot slide easily. Avoid fuzzy, very dark, textured or novelty yarns for your first knots, because they hide the loops and grab the hook.
Crochet hook size
Use the hook size printed on your yarn label. For many worsted weight yarns, this is about US H-8 (5.0 mm) or US I-9 (5.5 mm). These sizes are a common starting point, not a requirement. The slip knot itself works on any hook size, because the loop can be adjusted to fit.
Gauge and finished size
Slip knot: There is no gauge for a slip knot.
Optional practice swatch (provisional, not measured): 10 single crochet stitches across × 6 rows, in worsted weight yarn with the hook the label recommends. The size has not been measured. It is expected to be a small rectangle only a few inches wide. Gauge does not matter for a practice piece. Record the real measurement when the sample is made, or remove all size claims before publication.
US crochet abbreviations
| Abbreviation | Meaning (US terms) | Notes |
|---|---|---|
| ch | chain | The foundation of most projects |
| sc | single crochet | Called “double crochet” (dc) in UK terms. This pattern uses US terms only. |
| sl st | slip stitch | Not the same thing as a slip knot |
| st(s) | stitch(es) | |
| yo | yarn over | Wrap the yarn over the hook from back to front |
| ( ) | stitch count | The number in parentheses at the end of a row is the total for that row |
Special stitches and notes
- Tail and working yarn. The tail is the short loose end, about 6 inches long. The working yarn is the strand that runs to the ball or skein.
- The slip knot is not counted. In this pattern, as in most US patterns, the slip knot is not counted as a chain. When you chain, count only the chains you make, not the loop on your hook.
- The loop on your hook is never counted. It does not count as a chain or as a stitch.
- Turning chain. In the practice swatch, the ch-1 at the start of each row is a turning chain. It does not count as a stitch. Work the first sc into the first stitch of the row.
- Right-handed and left-handed crocheters. These instructions describe a right-handed crocheter, with the hook in the right hand. Left-handed crocheters can mirror the hand positions. The knot is the same.
Step-by-step: how to make a slip knot for crochet
Method 1: The loop-and-pull method (recommended for beginners)
- Measure the tail. Leave about 6 inches of yarn free at the end. This is your tail. The rest of the yarn, running to the ball, is your working yarn.
- Make a loop. Hold the yarn about 6 inches from the end. Cross the working yarn over the tail to make a circle about 1 inch across. Pinch the crossing point between your left thumb and index finger.
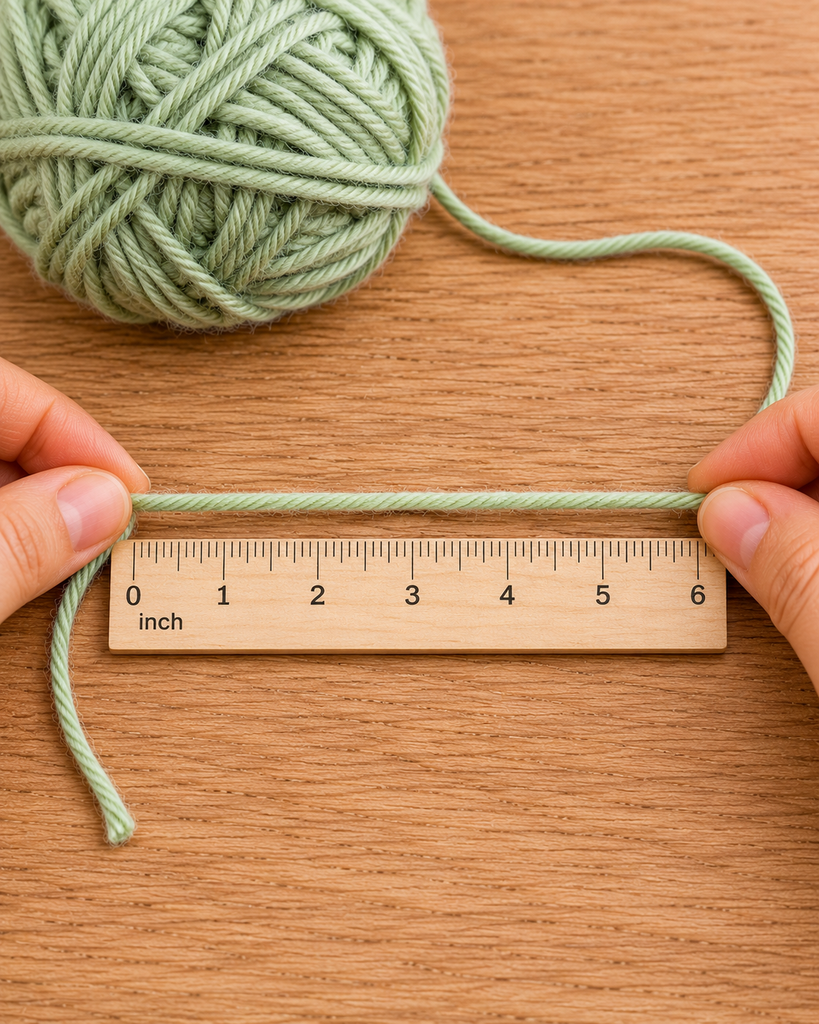
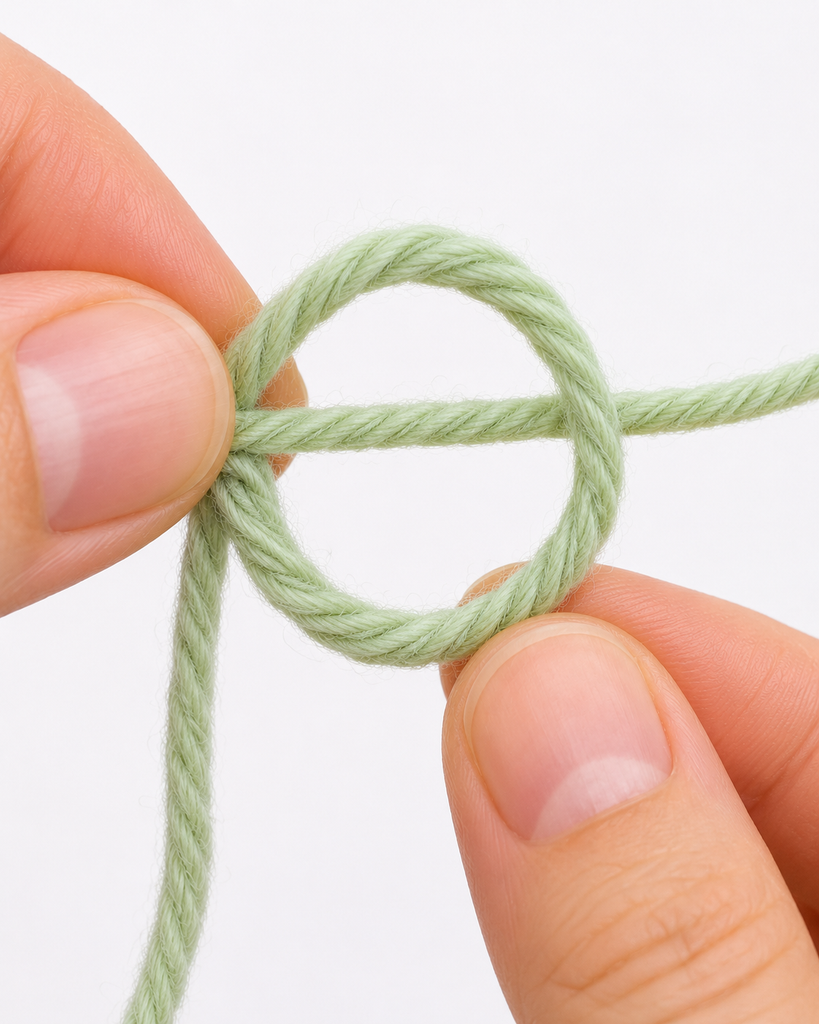
- Lay the loop on the working yarn. Fold the circle down so it lies on top of the working yarn. Now you can see the working yarn running behind the center of the circle.
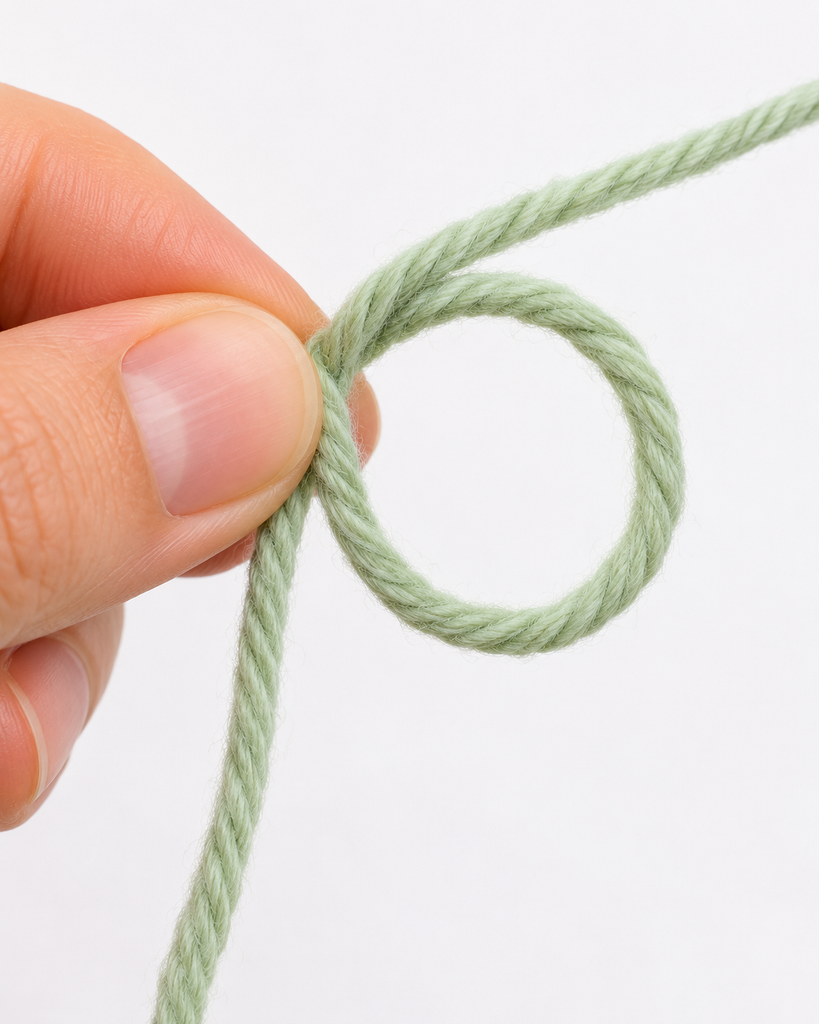
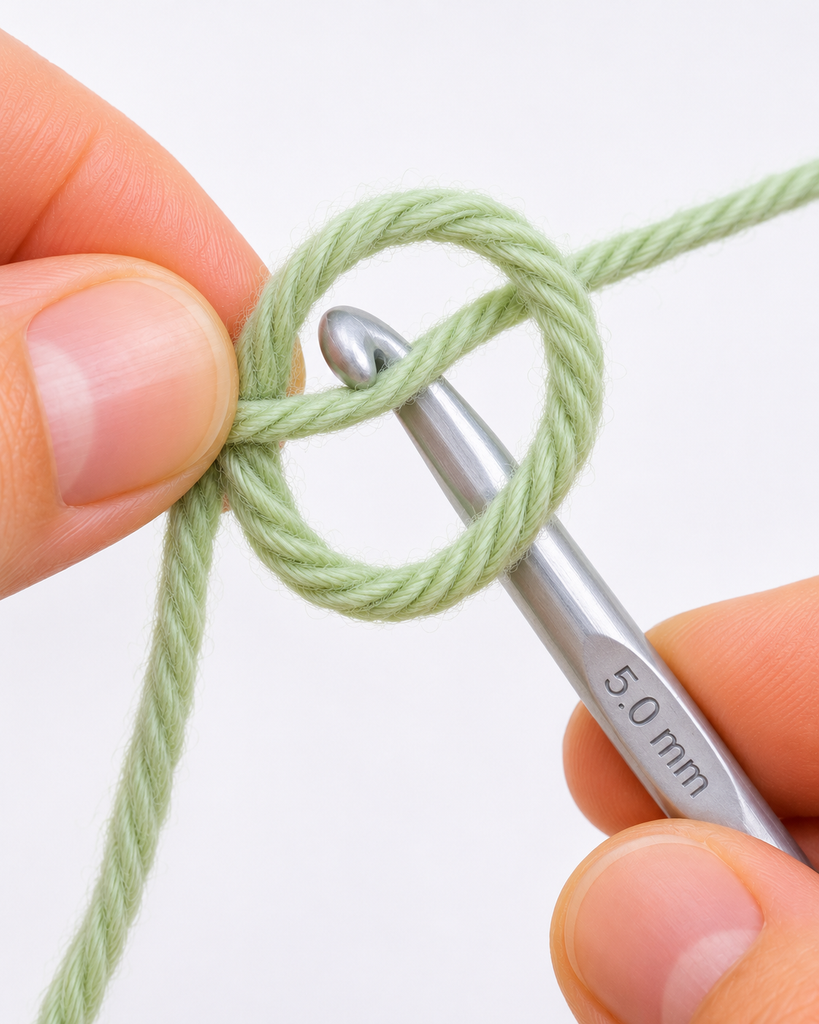
- Insert the hook. Hold the hook in your right hand. Push the hook head down through the center of the circle, from front to back.
- Catch the working yarn. Hook the strand of working yarn that you can see behind the circle. Make sure you catch the working yarn, not the tail.
- Pull up a loop. Draw that strand forward through the circle. Now there is a loop of yarn around the hook, with a knot below it.
- Tighten the knot. Hold the hook and gently pull the tail to firm up the knot.
- Adjust the loop. Gently pull the working yarn to shrink the loop until it sits snugly on the hook. It should slide easily along the hook without being loose or tight.
Check your knot. Tug each end of the yarn. With this method, the working yarn is expected to adjust the loop size, and the tail is expected to tighten the knot. If yours works the other way round, you probably caught the tail in step 5. The knot still works for crochet, but redo it if you want the standard result. (Verify with a physical sample.)
Method 2: Making the slip knot directly on the hook
- Leave a 6-inch tail. Lay the yarn over the hook shaft, with the tail in front and the working yarn behind.
- Twist the hook once so the yarn wraps around it and crosses itself, making a loop on the hook.
- Yarn over with the working yarn.
- Pull that yarn over through the loop on the hook.
- Pull the tail to tighten the knot, then adjust the loop with the working yarn.
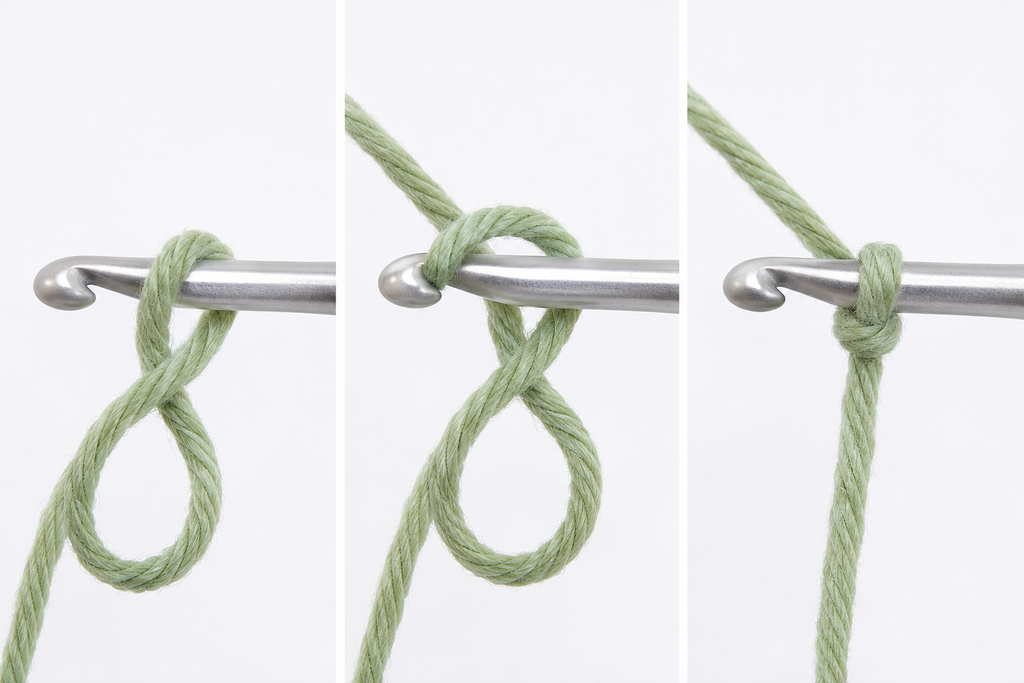
Method 2 is faster when you already know Method 1, but it is harder to describe in text. Check the direction of the twist against a physical sample and a step photo before publishing.
Practice swatch: row-by-row instructions with stitch counts
This optional mini swatch uses your slip knot right away. Worked in US terms.
Foundation: Make a slip knot on your hook (it does not count). Ch 11.
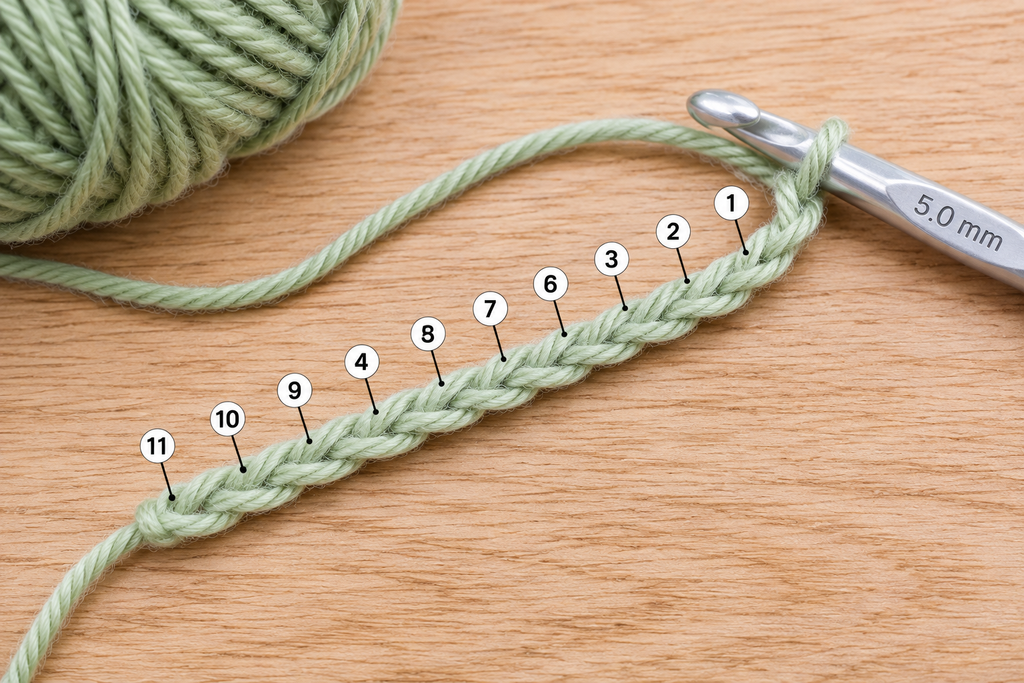
Row 1: Sc in the 2nd ch from the hook and in each ch across. (10 sc)
The skipped first chain is not a stitch. It only gives the row its height.
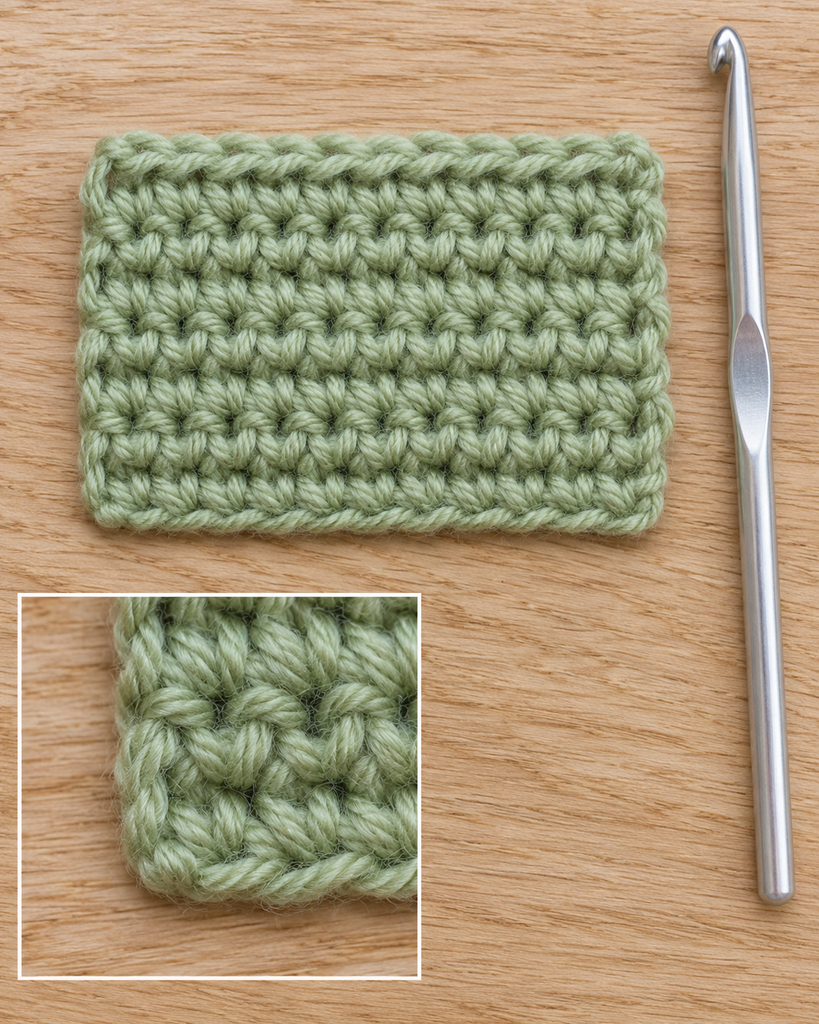
Row 2: Ch 1 (does not count as a stitch), turn. Sc in each sc across. (10 sc)
Rows 3–6: Repeat Row 2. (10 sc in each row)
Fasten off. Cut the yarn, leaving a 6-inch tail, and pull it through the loop on your hook.
Stitch count summary: Ch 11 → 10 sc in each of Rows 1–6. This is 60 sc in total. There are no increases or decreases.
Finishing and assembly
The slip knot needs no finishing. It stays at the bottom corner of your work. For the practice swatch, thread each 6-inch tail onto a yarn needle. Weave it in and out through the backs of a few stitches in one direction, then back the other way. Trim the yarn close to the fabric. There is no assembly.
Helpful beginner tips for your crochet slip knot
- Practice with nothing on the line. Tie and pull out 10 slip knots in a row before you start a project. The movement quickly becomes automatic.
- Snug, not tight. The loop should slide along the hook shaft. If you cannot move it, your first chain will be hard to work.
- Keep the tail long enough. A 6-inch tail gives you enough yarn to weave in later.
- Use a light, smooth yarn. You will see each strand clearly.
- Hold the knot, not the loop. When you start chaining, pinch the knot just below the hook with your left thumb and middle finger. This keeps it from spinning.
- Use your slip knot for every new start. You also use it when you join a new color with a fresh start, or when you begin a new piece of the same project.
Common mistakes and solutions
| Problem | Likely cause | Solution |
|---|---|---|
| The knot falls apart when you pull | The yarn was not pulled through the circle, so there is only a twist and no knot | Start again and pull a loop of yarn all the way through the circle (Method 1, step 6) |
| The loop will not get smaller | You are pulling the end that tightens the knot | Pull the other end. Usually the working yarn adjusts the loop. |
| The tail adjusts the loop instead of the working yarn | You caught the tail in step 5 | It still works. Redo it if you want the standard result. |
| The loop is too tight to work into | You over-tightened it | Pull the loop gently up from the knot to loosen it, or start again |
| The tail is too short to weave in | You left less than about 4 inches | Pull out the knot and leave a 6-inch tail |
| You counted the slip knot as a chain | Common counting mix-up | Count only the chains you make, not the slip knot or the loop on the hook |
| Mixing up slip knot and slip stitch | The names are similar | The slip knot is the starting loop. A slip stitch (sl st) is worked into stitches. |
Care instructions
A slip knot has no care needs of its own. If you keep the practice swatch, follow the care instructions on your yarn label. Many acrylic and cotton worsted yarns are machine washable, but check your own label.
Frequently asked questions
Does the slip knot count as a stitch in crochet?
In most US patterns, no. The slip knot is not counted as a chain or a stitch. A few designers do count it, so read the pattern notes.
Do I always need a slip knot to start crocheting?
Most flat projects start with one. Some projects worked in the round start with a magic ring (also called a magic loop) instead. There are also slip-knot-free ways to start a chain, but most beginners start with the slip knot.
Which end of the yarn should tighten the loop?
With the method in this guide, the working yarn is expected to adjust the loop and the tail tightens the knot. Some crocheters prefer the opposite. Either works, as long as the loop fits your hook.
How long should the tail be?
About 6 inches is a good general length to weave in. If you plan to sew pieces together with the tail, leave a longer one, as the pattern tells you.
Is a crochet slip knot the same as a knitting slip knot?
It is the same basic knot. In knitting it goes on the needle as the first cast-on stitch. In crochet it is the starting loop, and it is not usually counted.
Why does my slip knot keep coming undone?
You probably made a twisted loop without pulling yarn through it. Make sure a loop of yarn passes completely through the circle before you tighten.
Conclusion
Now you know how to make a slip knot for crochet, the first step in every chain-based project. Make a circle, pull the working yarn through it, tighten with the tail, and adjust the loop to fit your hook. Practice it a few times, then try the 10-stitch swatch to see your slip knot become part of real fabric. Your next step is the chain stitch, and soon you will be ready for your first beginner project.